Administration Panel (CQM)
Use the Admin panel to set-up users and to establish parameters used when creating accounts and opportunities.
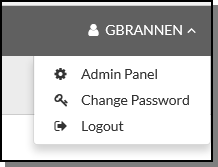
The Admin panel is accessed by clicking on the user name in the upper right hand corner and selecting Admin Panel.
The Admin Panel contains the following options:
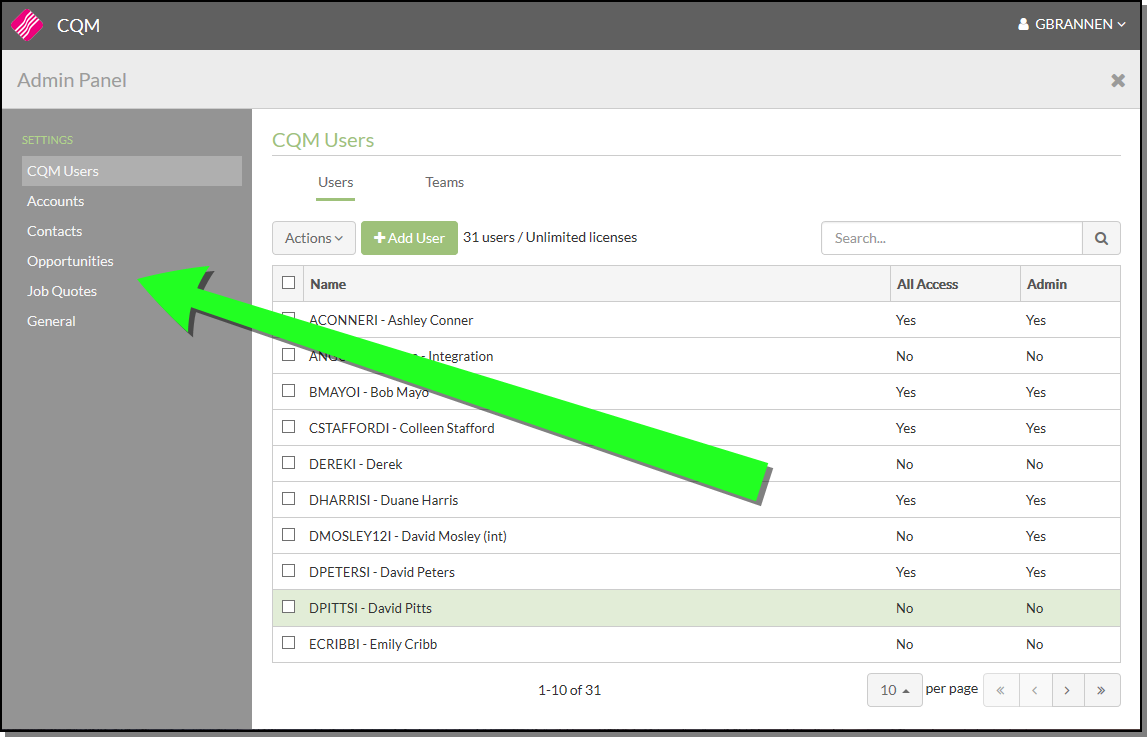
CQM Users
Adding Users
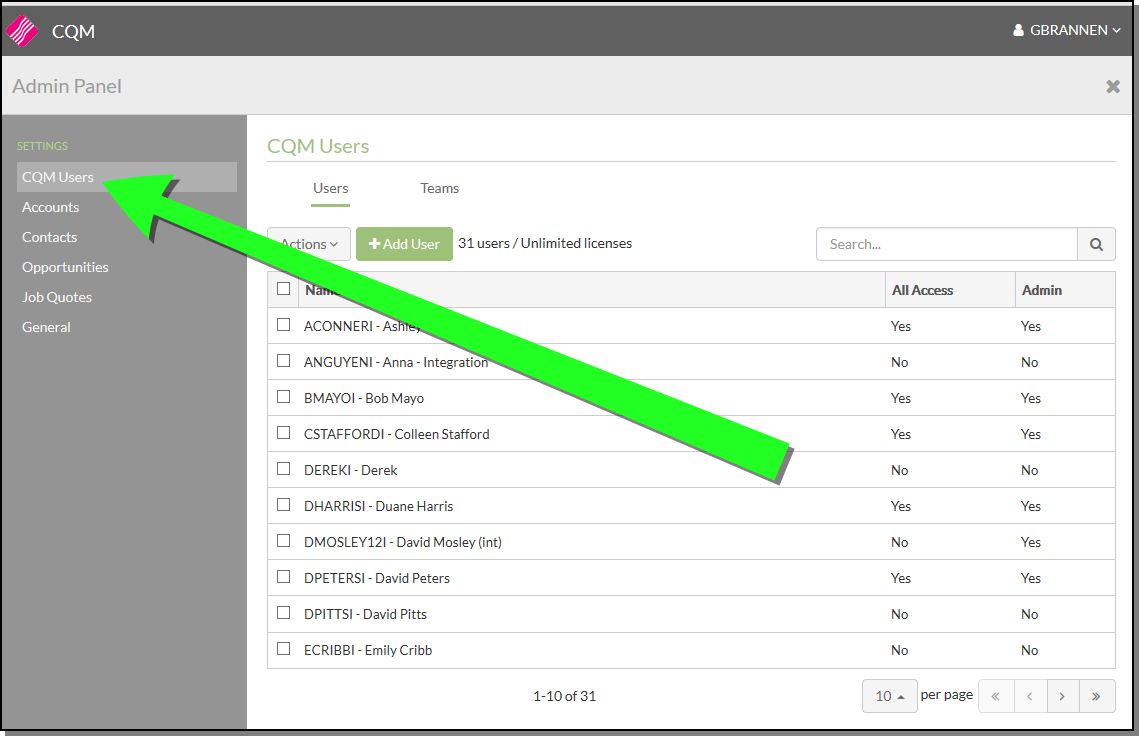
- Click CQM Users; located on the left hand side of the window.
-
Click Add User.
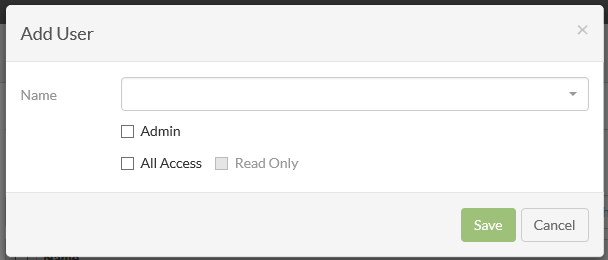
- Admin - Selecting this grants the user access to the Admin Panel.
- All Access - These users can access all of the information and make changes; such as edit/update access to the Account, Contacts, Opportunities, and Job Quotes. This option grants edit/update access to the Account, Contacts and Opportunities information regardless of whether they created or are the owner of the information.
- Read only - Can only view Account, Contacts, Opportunities, and Job Quotes. This option grants viewing access to the Account, Contacts, Opportunities, and Job Quotes created by any user. However, they can only edit Accounts, Contacts, and Opportunities that they have created or have been assigned as the Owner.
Not selecting any of these options means that the user is a standard CQM user with the following access:
- Accounts: Has access to view all Accounts created by any user, but can only edit Accounts that they have created or have been assigned as the Owner.
- Contacts: Has access to view all Contacts created by any user, but can only edit Contacts that they have created or have been assigned as the Owner.
- Opportunities: Only has access to view or update Opportunities that they have created or have been assigned as the Owner. They cannot see Opportunities created by other users.
- Job Quotes: Only has access to view or update Job Quotes that they have created or have been assigned as the Owner. They cannot see Job Quotes created by other users.
Deleting Users
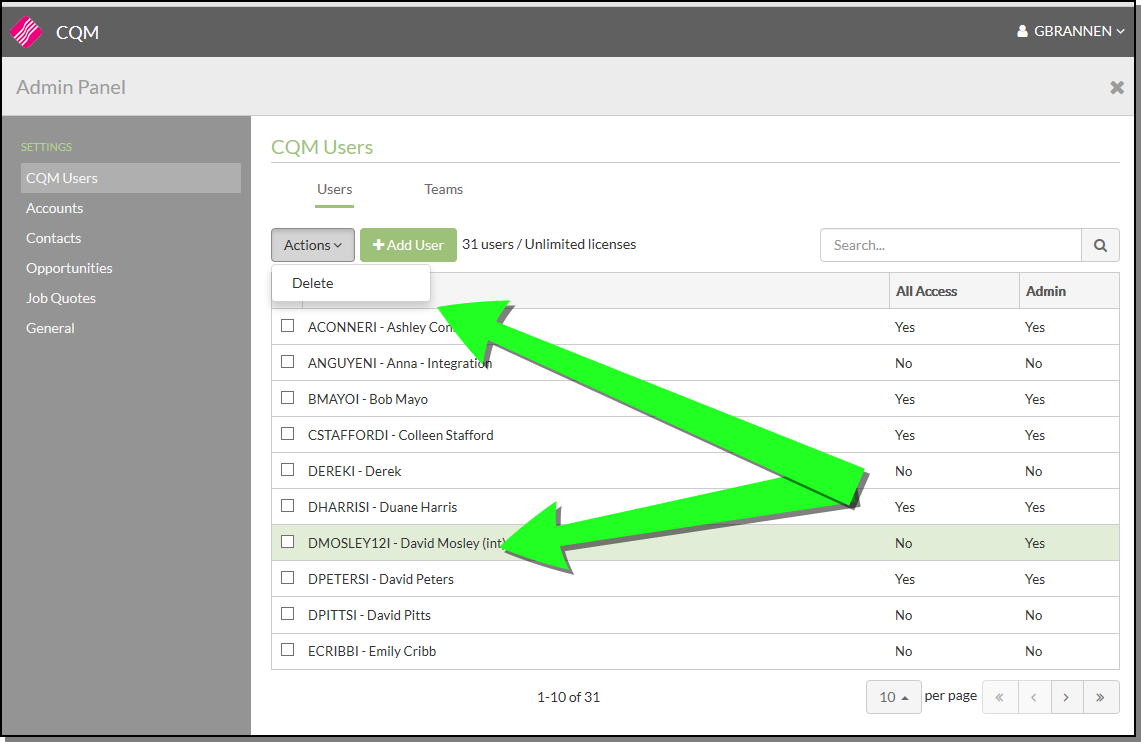
Select a user and then select Delete under the Actions button.
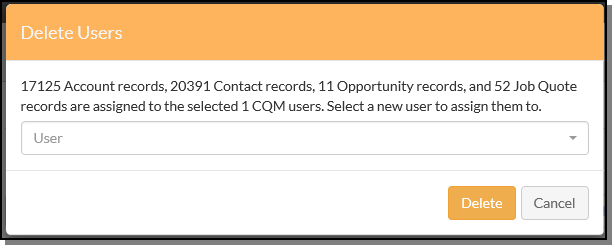
If the user being deleted has CQM information; such as contacts and opportunities, assigned to them, the following warning appears.
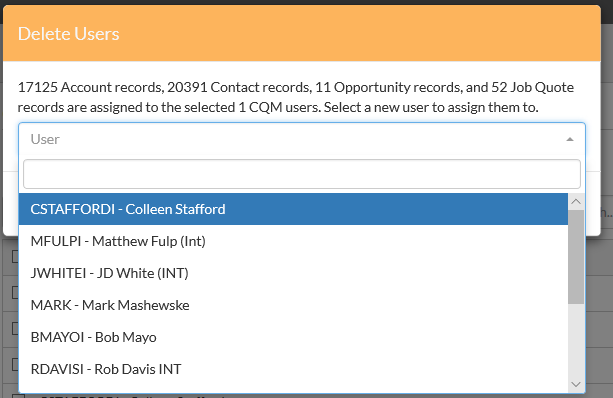
Use the User drop down listing to select a new user to assign the information to.
If the user is not assigned to any accounts, contacts, opportunities or job quotes, you can click Delete to remove the user from CQM.
Teams
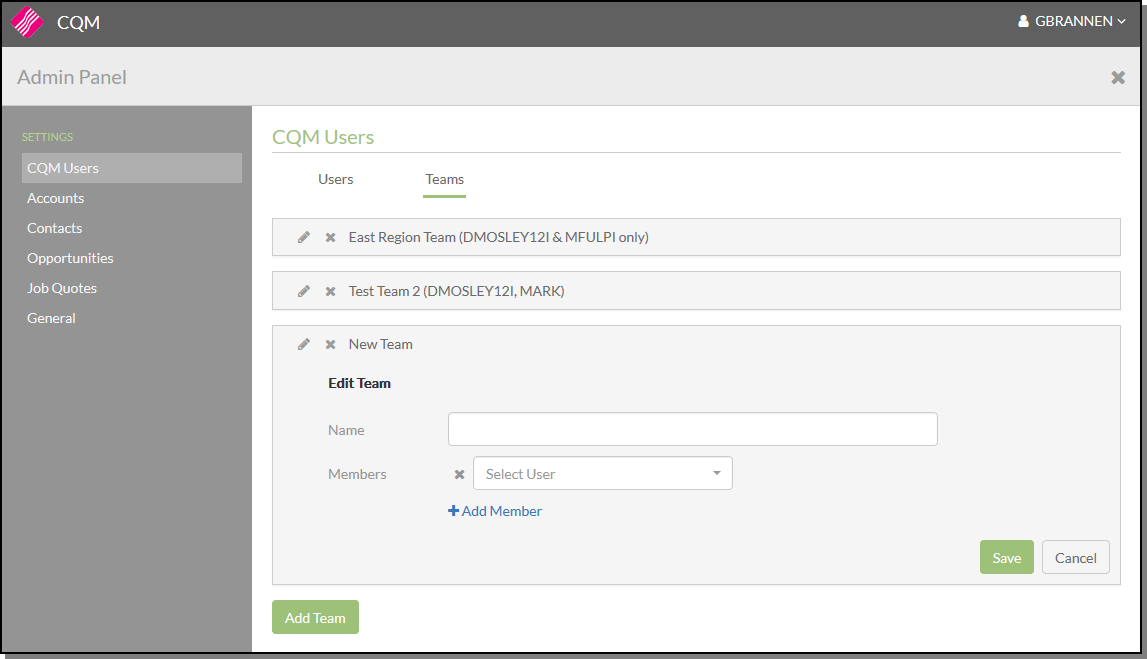
The Team option allows you to assign users to groups. Once in a group, a user's access level to other records created by other members of the group can be controlled.
- Access the Admin Panel.
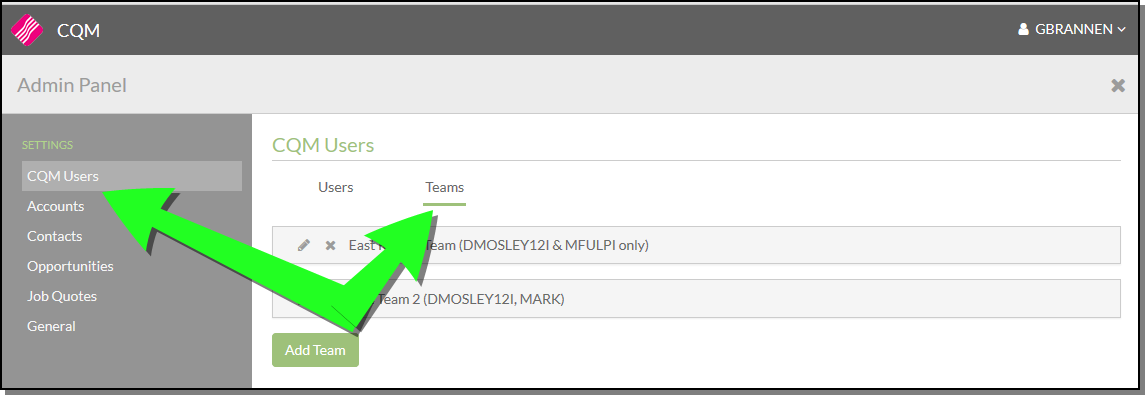
- Click CQM Users and select Teams.
- Work with an existing team or, as shown below, create a new team.
Access Rules
- A team member always has access to records they own.
- A user who is a part of a team and has the Team Access flag set can edit records owned by any member of the team.
- The Read Only flag allows a team member to only view records owned by other team members.
Users who are set-up with All Access, at the user level, can access team member records regardless if they are in the team or not. Follow this path to check on a user’s All Access permissions: Admin Panel>CQM Users>Click on a User.
Accounts
Custom Values
- Click Accounts.
- Add or edit the Industry and Type of account.
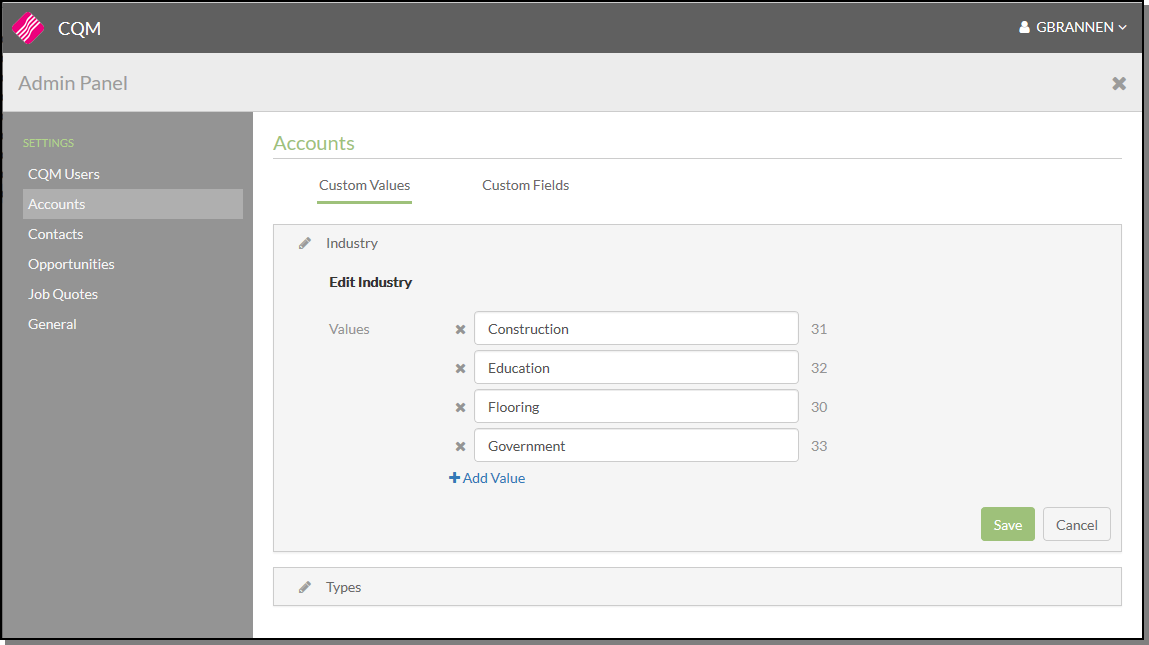
These values are used when creating new accounts.
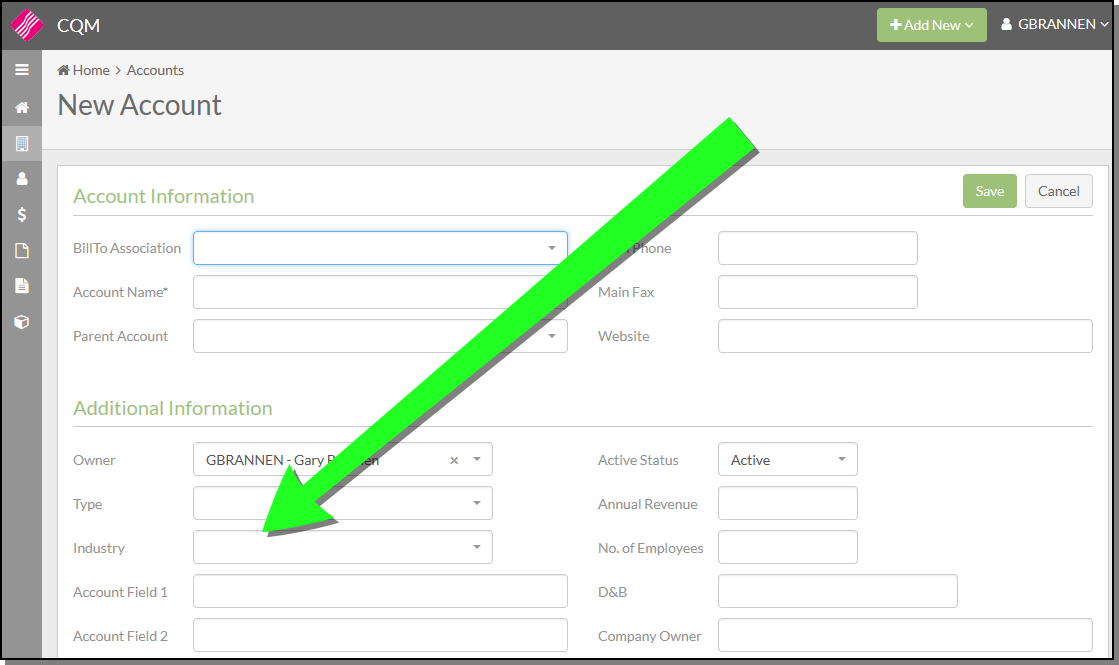
Custom Fields
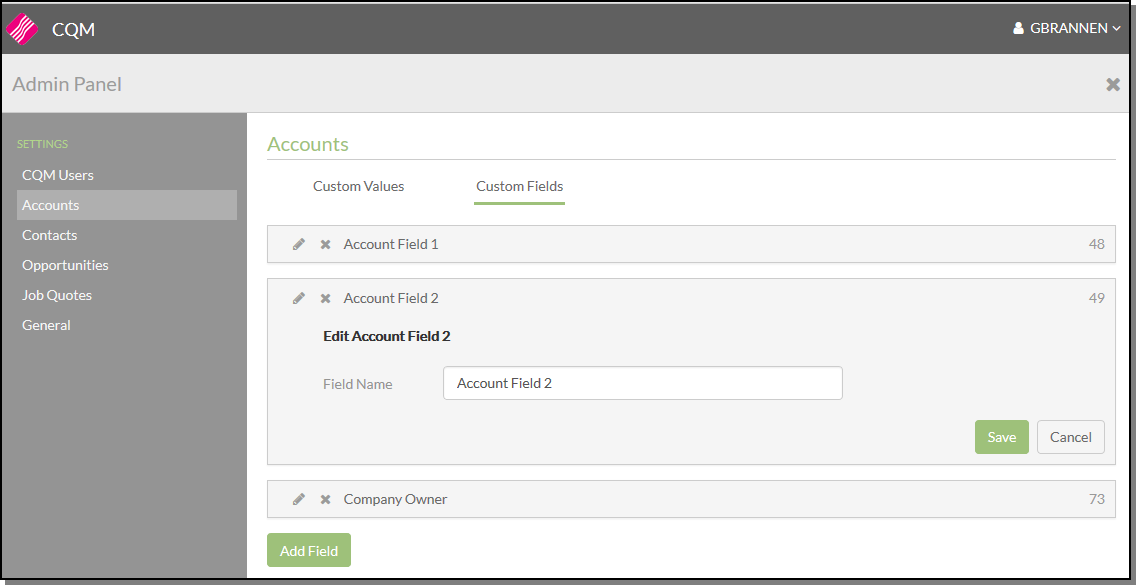
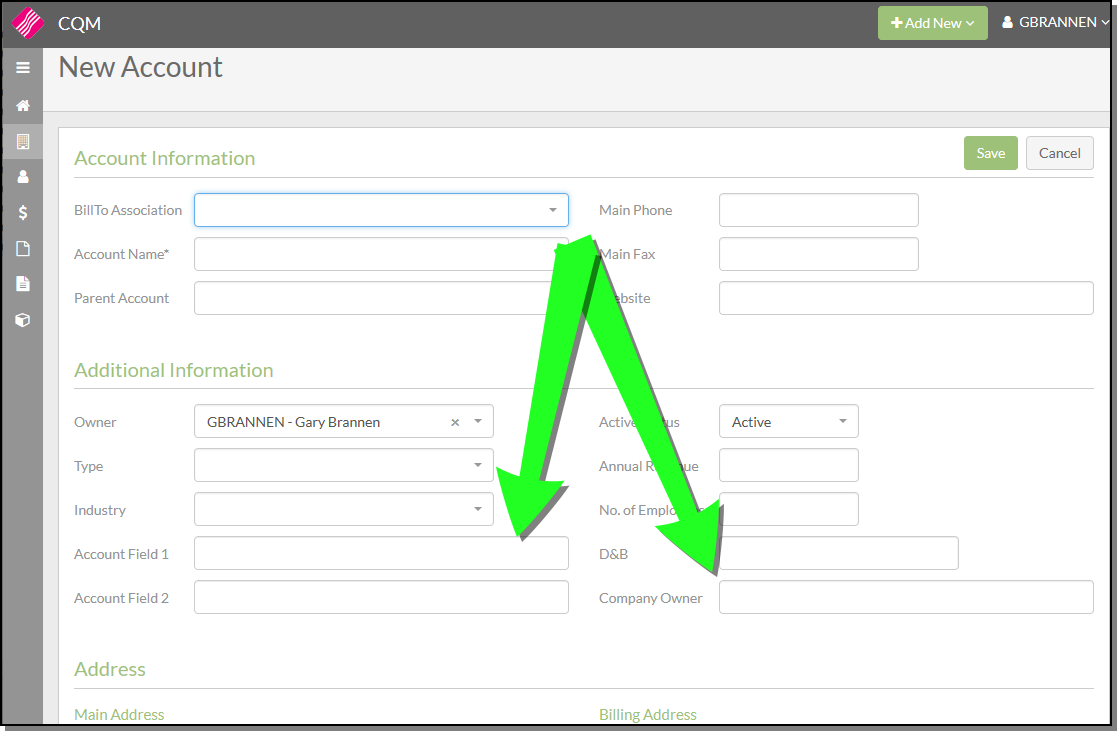
These fields are displayed in the Additional Information section of the Accounts window.
Contacts
Use the Custom Fields option to customize the fields on the Edit Contact window.
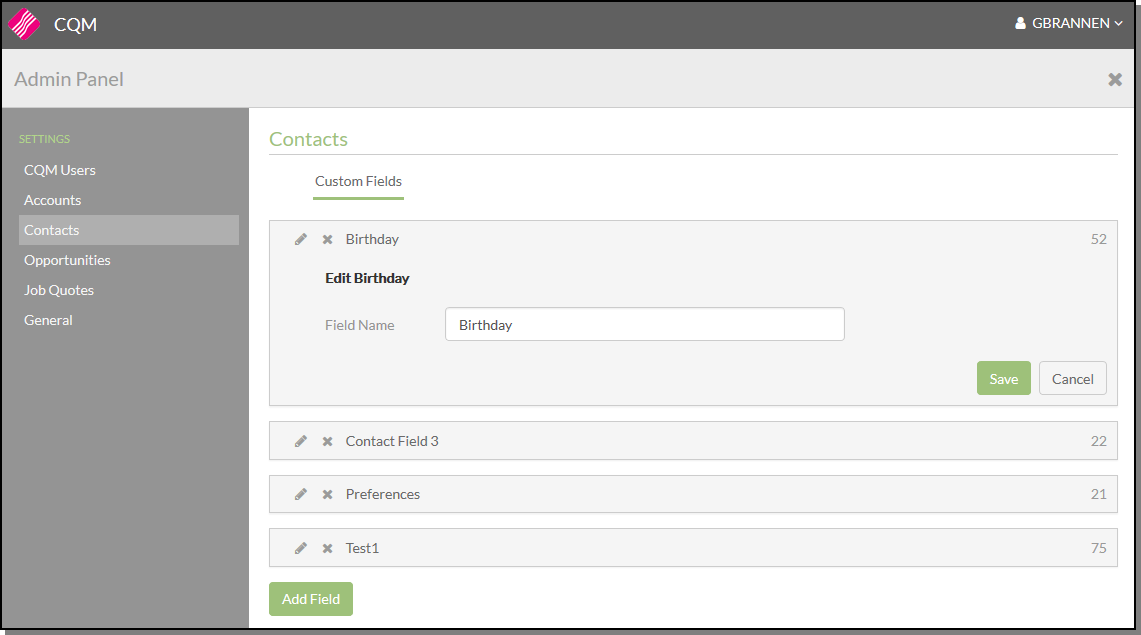
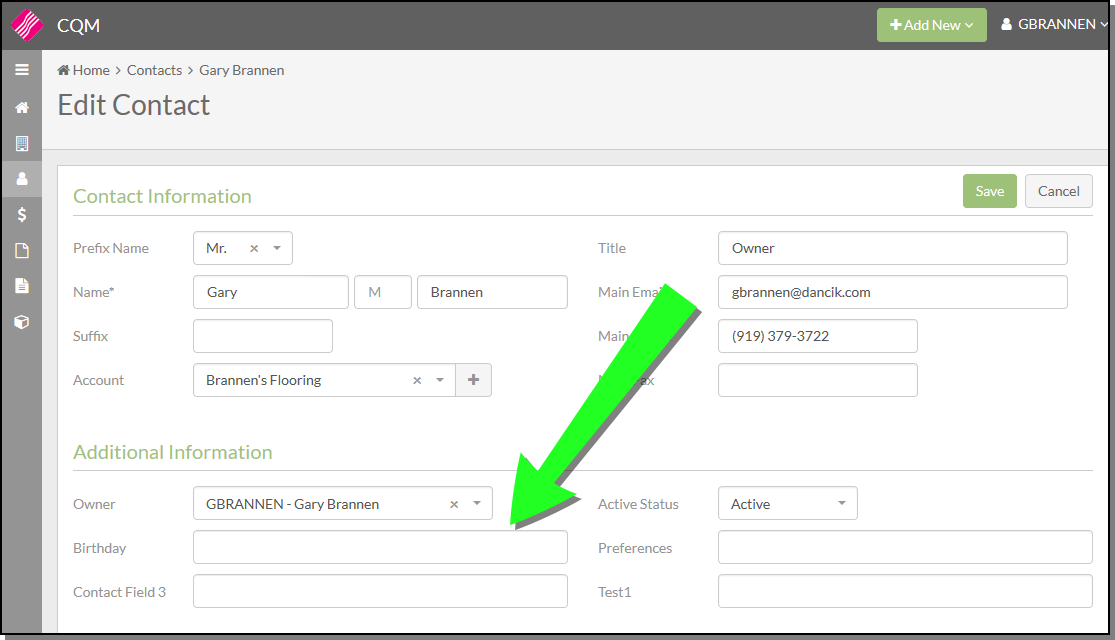
These fields are displayed in the Additional Information section of the Edit Contacts window.
Opportunities
This part of the admin panel allows you to define the Segments and Sales Stages used when creating or editing Opportunities.
Custom Values
Segments
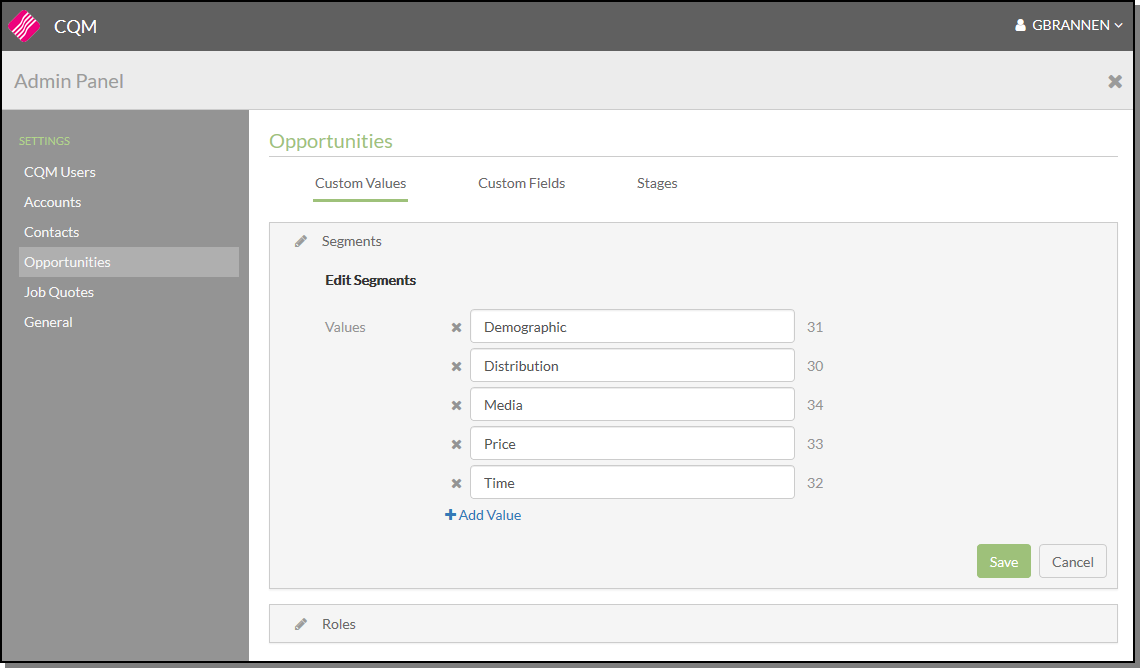
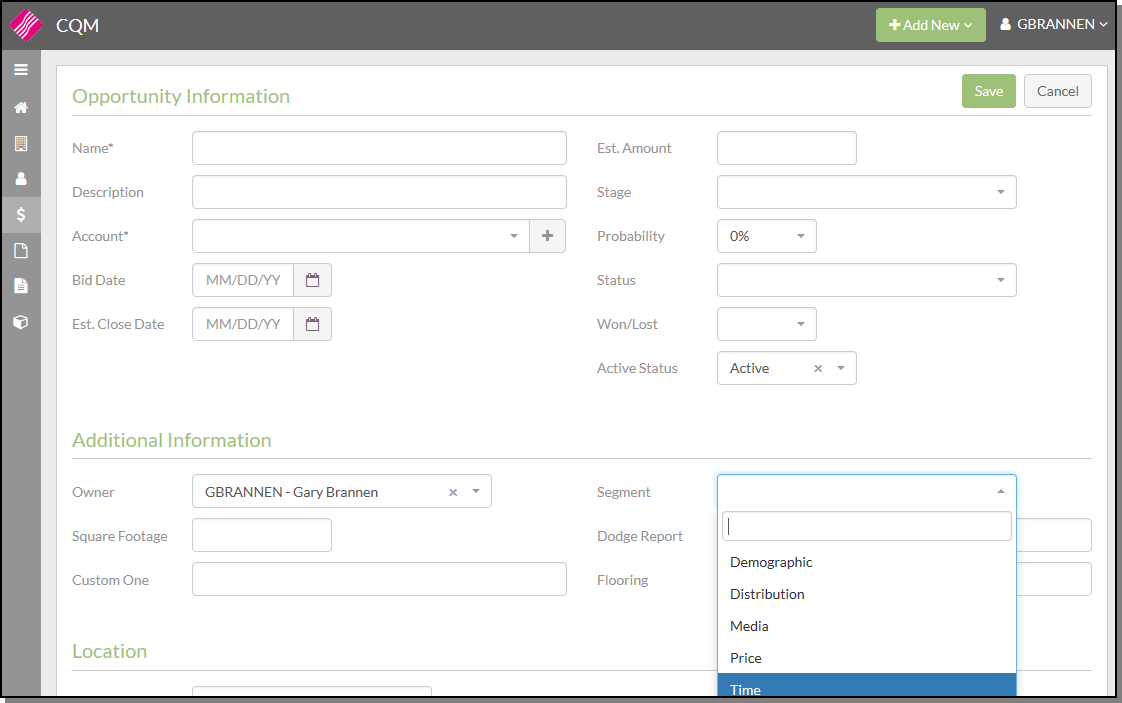
These segments populate the drop down menu when creating or editing Opportunities.
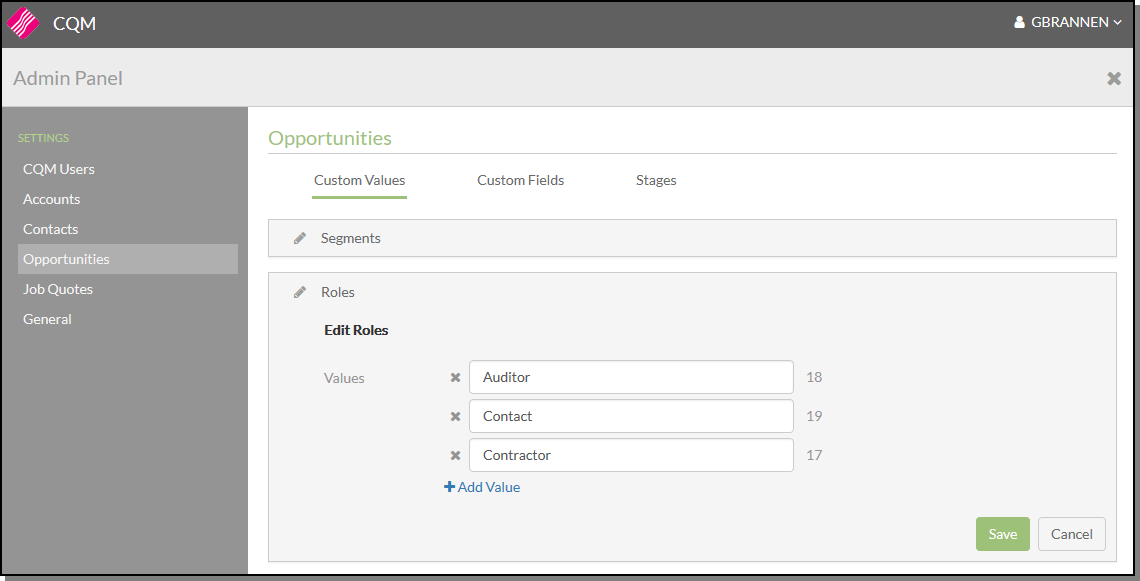
Roles
The ability to add Roles is also located under Custom Values. Roles are assigned to Accounts and Contacts that are associated to Opportunities.
Custom Fields
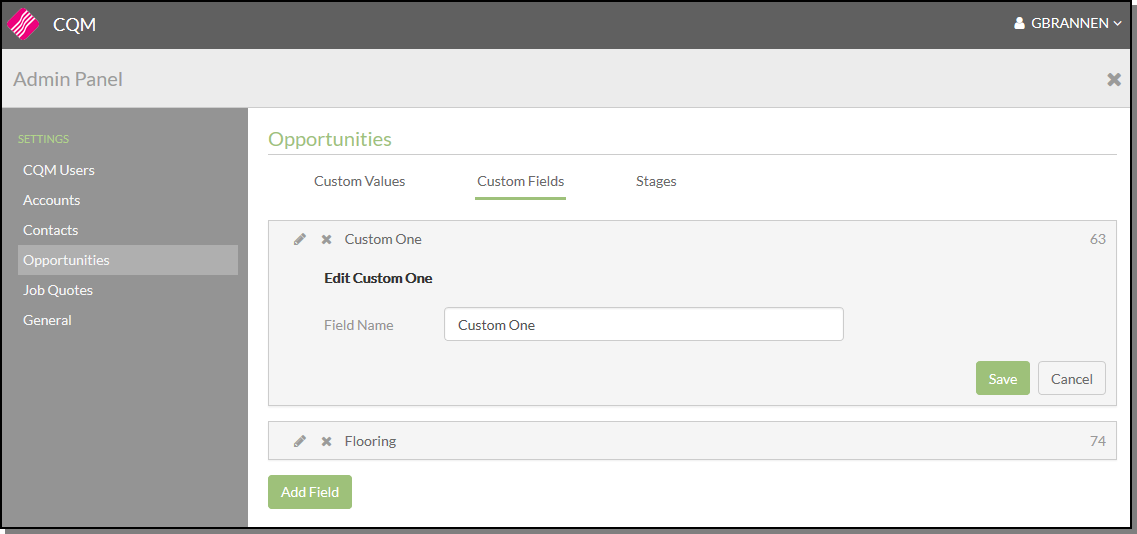
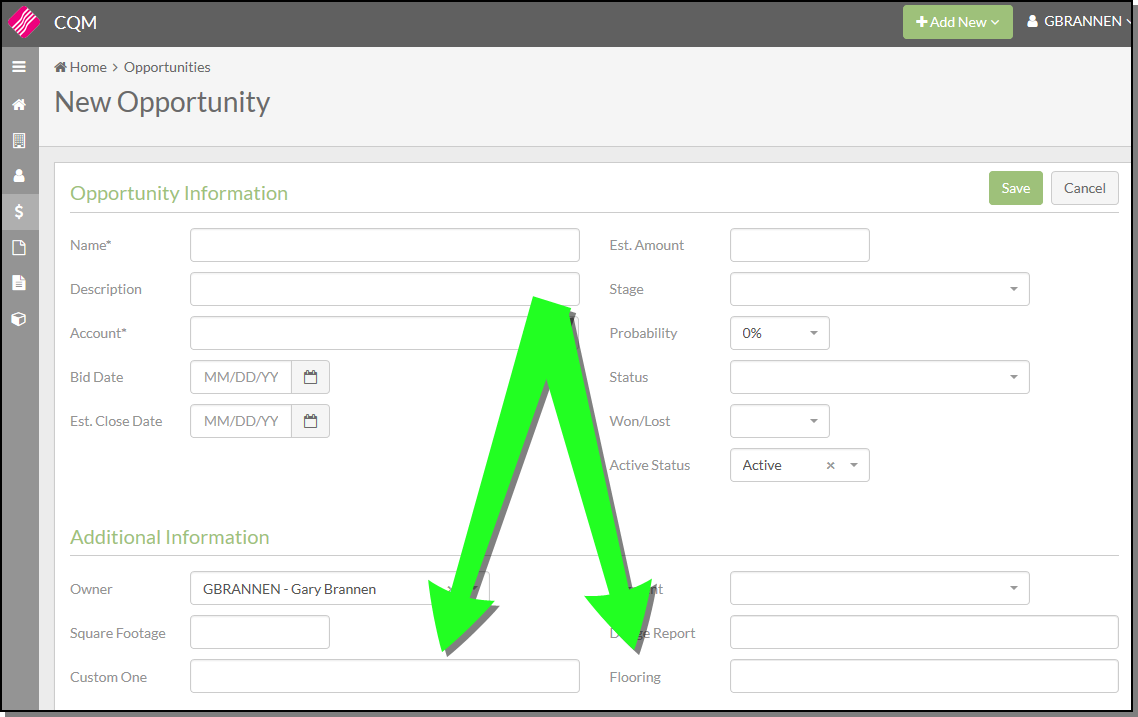
The Custom Fields are displayed on the Opportunity Window.
Stages
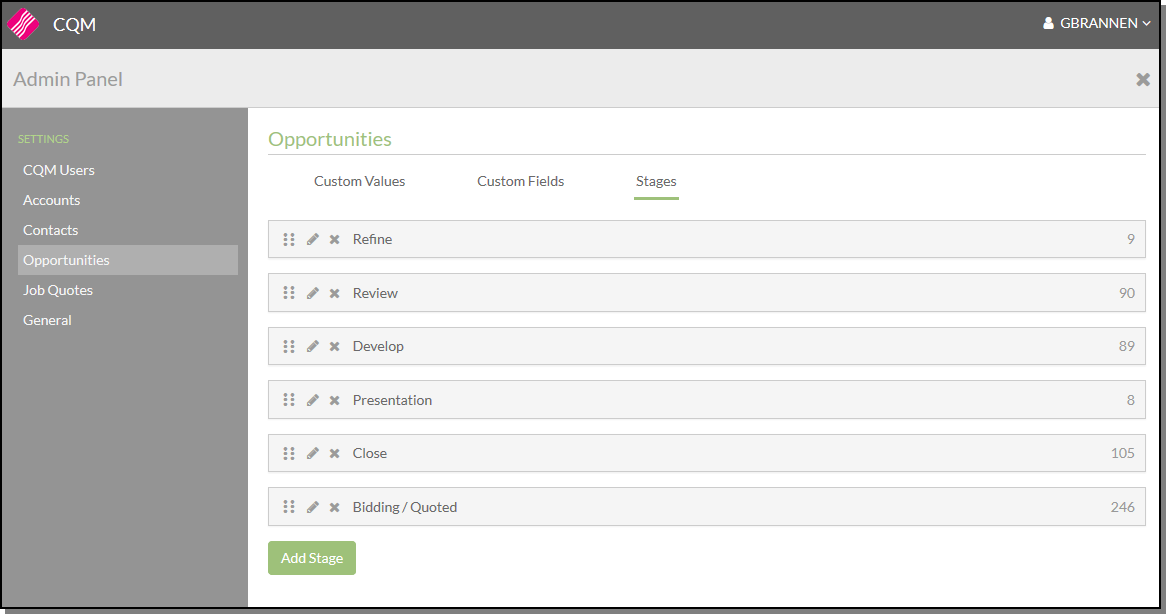
The listed stages can be moved up or down in the listing by dropping and dragging them.
Click one to display its details.
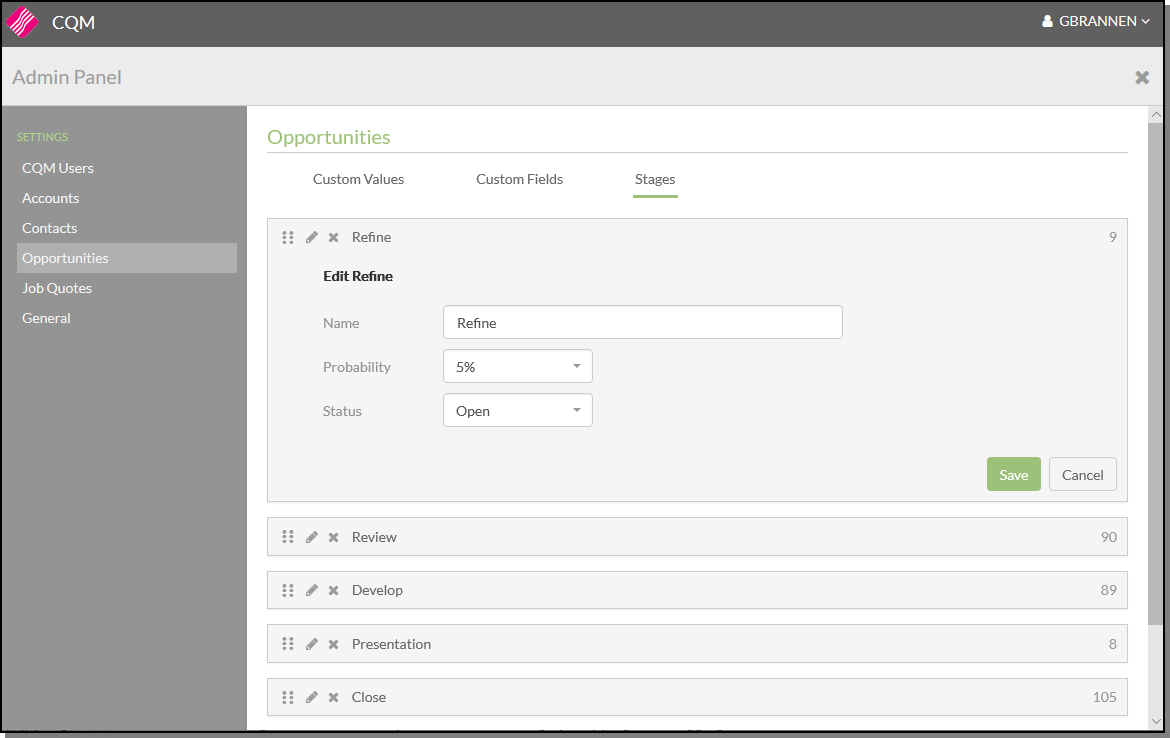
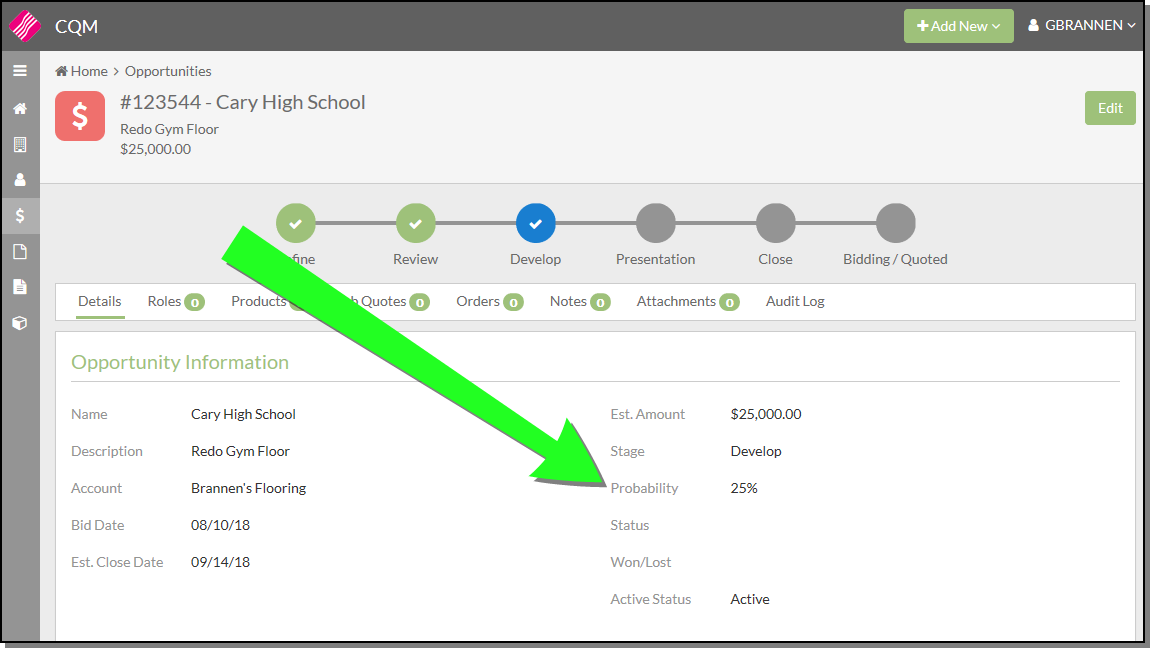
The Probability directs where the stage appears on the Opportunities window. The lower the number (the lowest is 0) the more toward the beginning of the sales cycle the stage is placed.
Job Quotes
Adding a Status
Click Add Value to add new status values to the list.
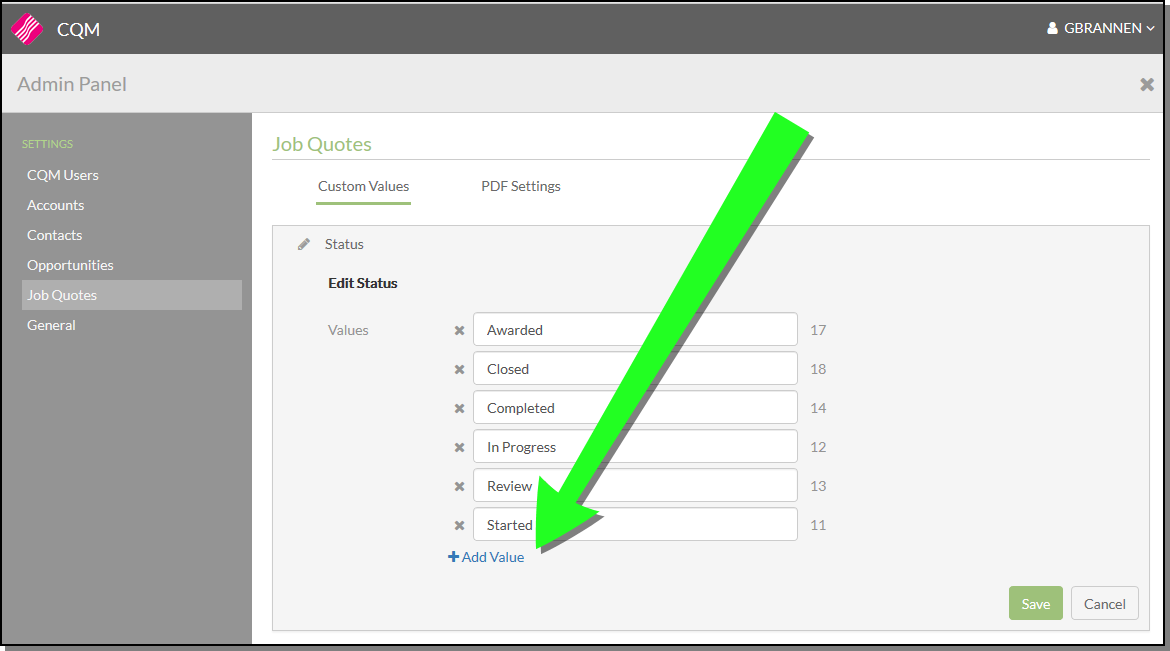
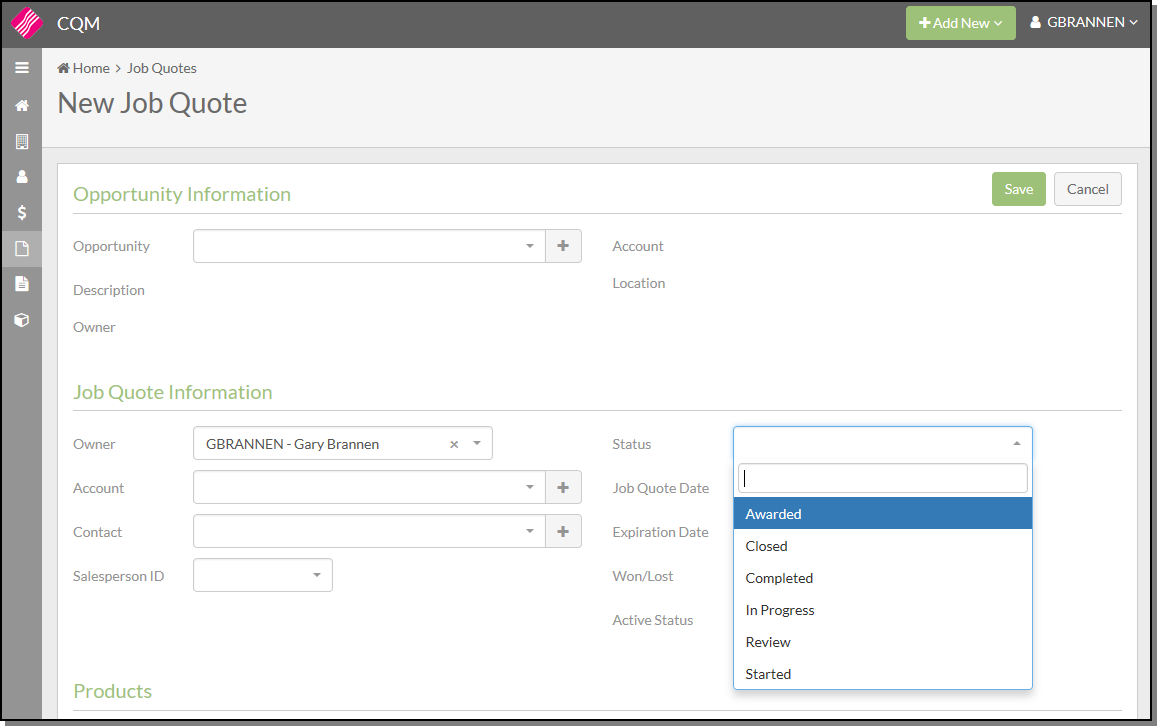
These statuses are accessed via the Status drop down when creating a new job quote.
PDF Settings
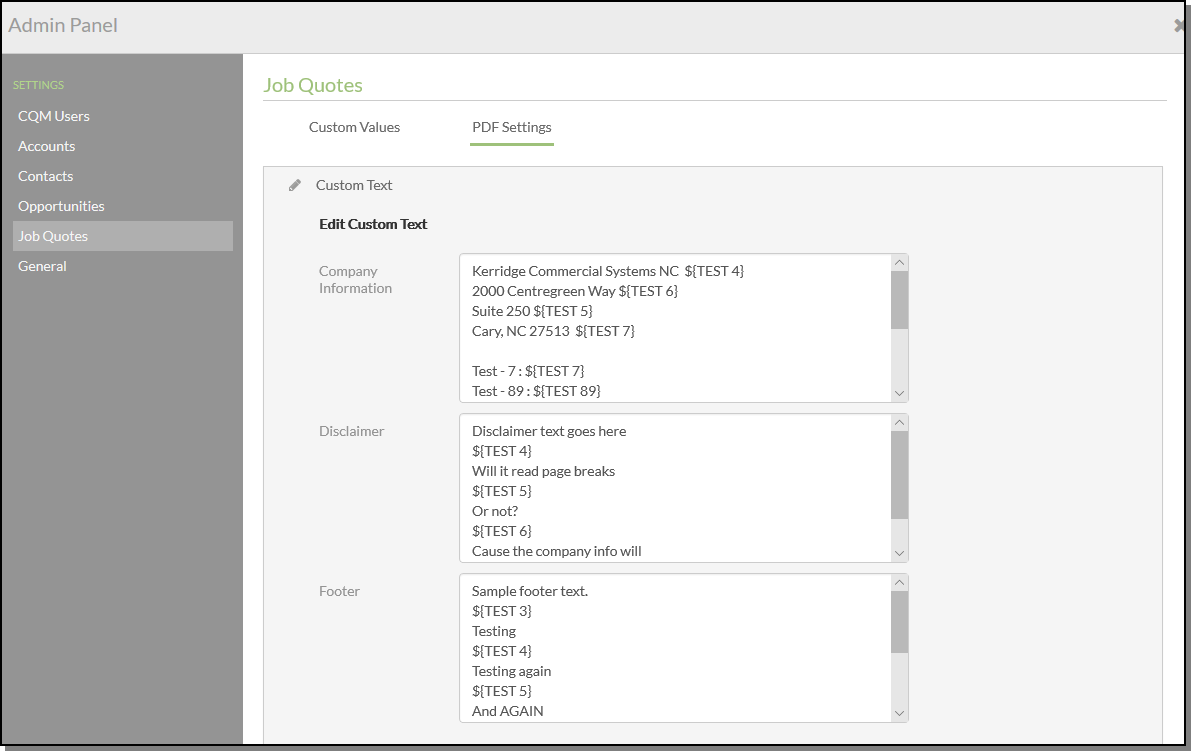
This setting allows you to add a logo and some default text to your PDFed job quotes.
The Disclaimer and Footer fields are accessed via the Custom Text section of the PDF Settings.
The Images and Colors section allows you to customize the logo and colors used on the PDF files.
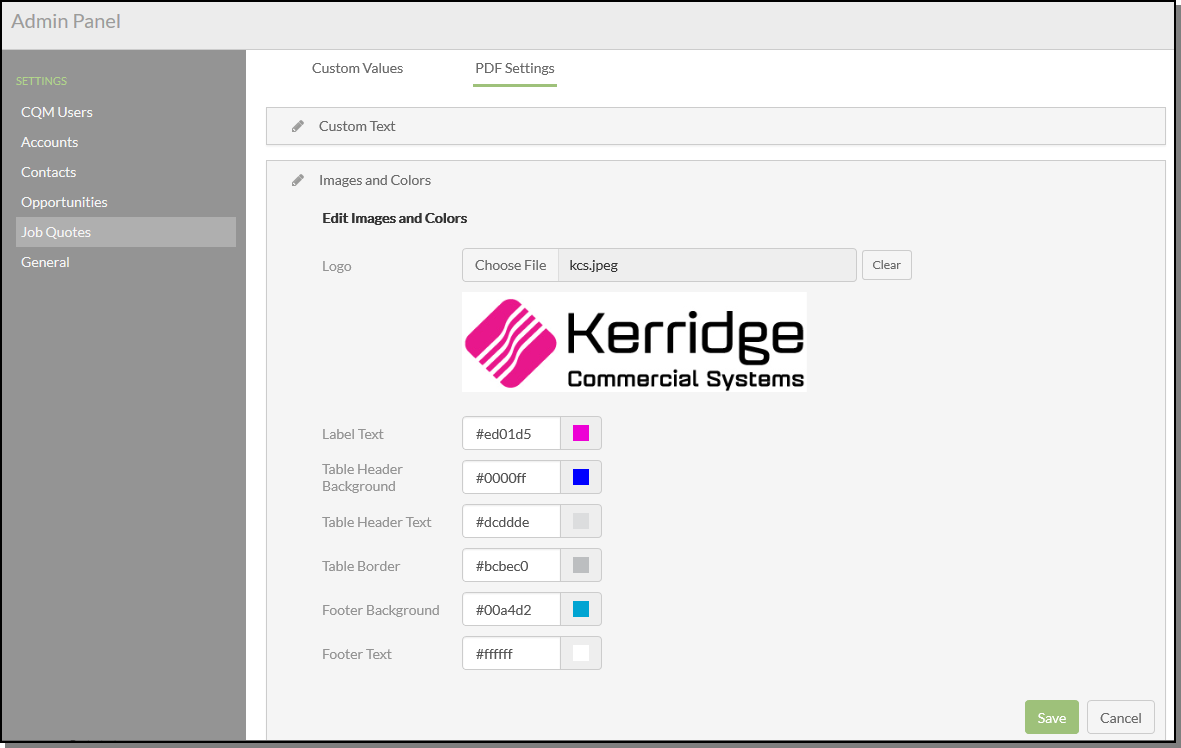
We recommend a 780x120px image so that it will print clearly. The actual image is scaled to fit in a 390x60px area.
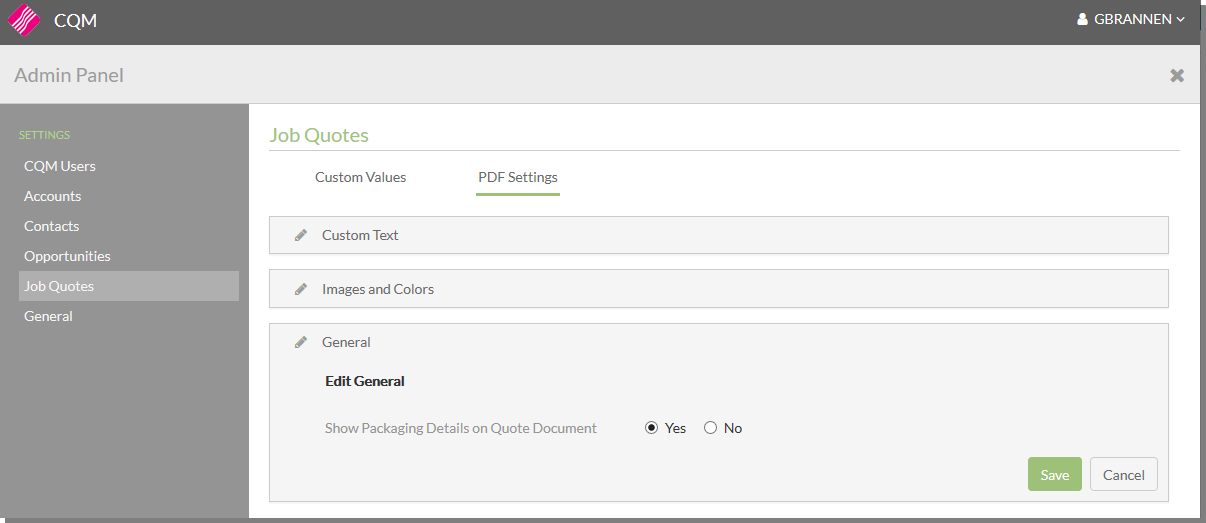
The General setting Show Packaging Details on Quote Document controls whether or not packaging details are displayed on the job quote PDF.
PDF Keywords
Assigning Overlays to CQM Users
Printing and Distributing Job Quotes
The PDF Keyword section provides a way to create unique CQM Job Quote PDF text to support quoting from different locations.
Process
- In the Job Quotes section of the Admin panel, set-up PDF Keywords (located under PDF Settings).
- In the admin panel Job Quotes section, the admin user creates Keyword Overrides which defines the values for the PDF Keywords. Once the keywords are created and values assigned the keywords can then be used in the Custom Text section of the PDF settings tab. This process is repeated for as many Overlays that are required.
- The admin then selects a CQM User and defines a default Keyword Override.
- The CQM user creates a job quote (or opens an existing one) and selects the Distribute or Print option.
- The Distribute or Print Job Quote screen opens displaying the values from the default Keyword Override.
- The user can leave the default style or from a dropdown they can select any other available presentation code. If no Keyword Override is selected blanks appear in place of the keywords that were defined in the Customer Text portion of PDF Settings.
- User prints or distributes the Job Quote PDF.
- The PDF that is printed or distributed matches either the default style assigned to the user or the one they manually selected in the Distribute or Print Job Quote screen.
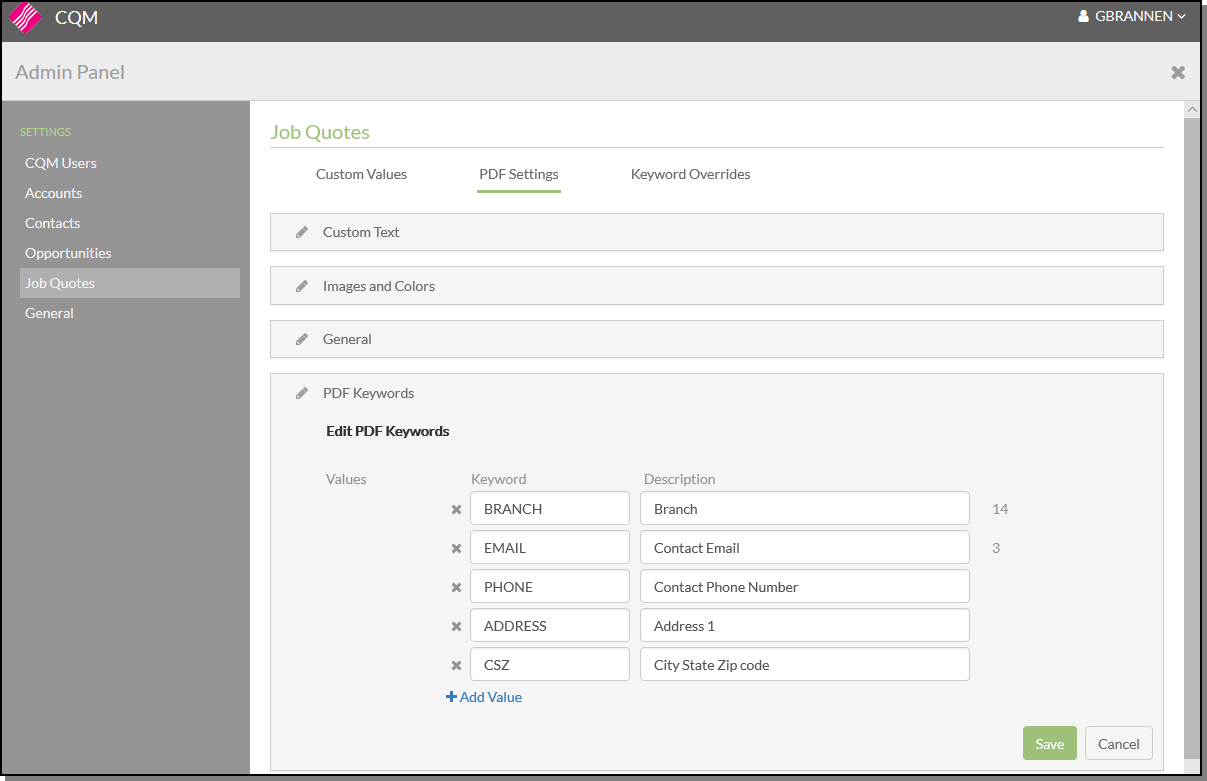
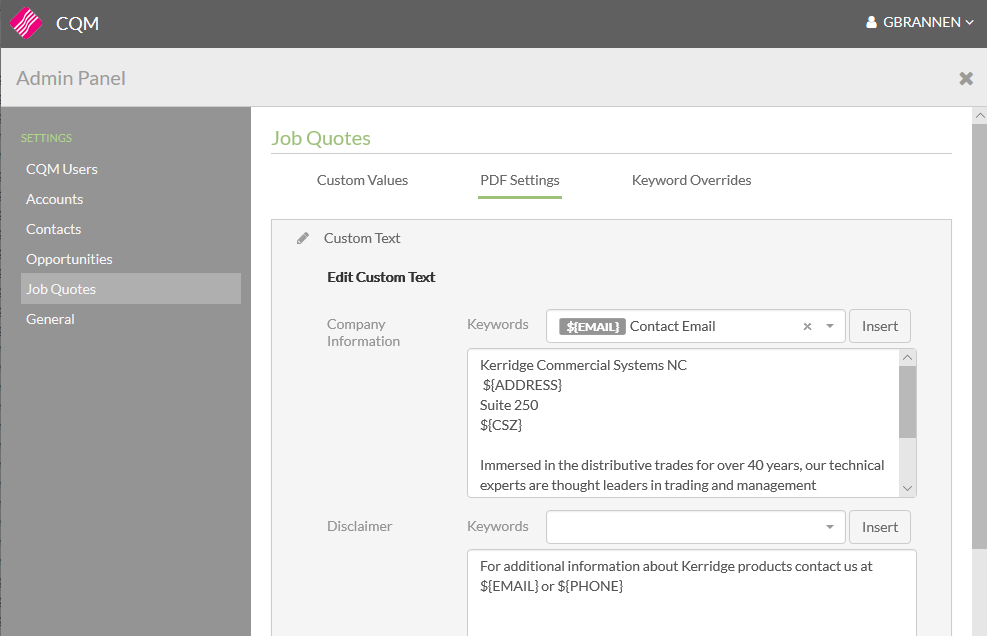
These keywords can be used in the Company Information, Disclaimer, and Footer sections and are translated to the corresponding presentation code values when a PDF is created.
Keyword Overrides
This section is where custom values (i.e. address, phone number) are assigned to the PDF Keywords.
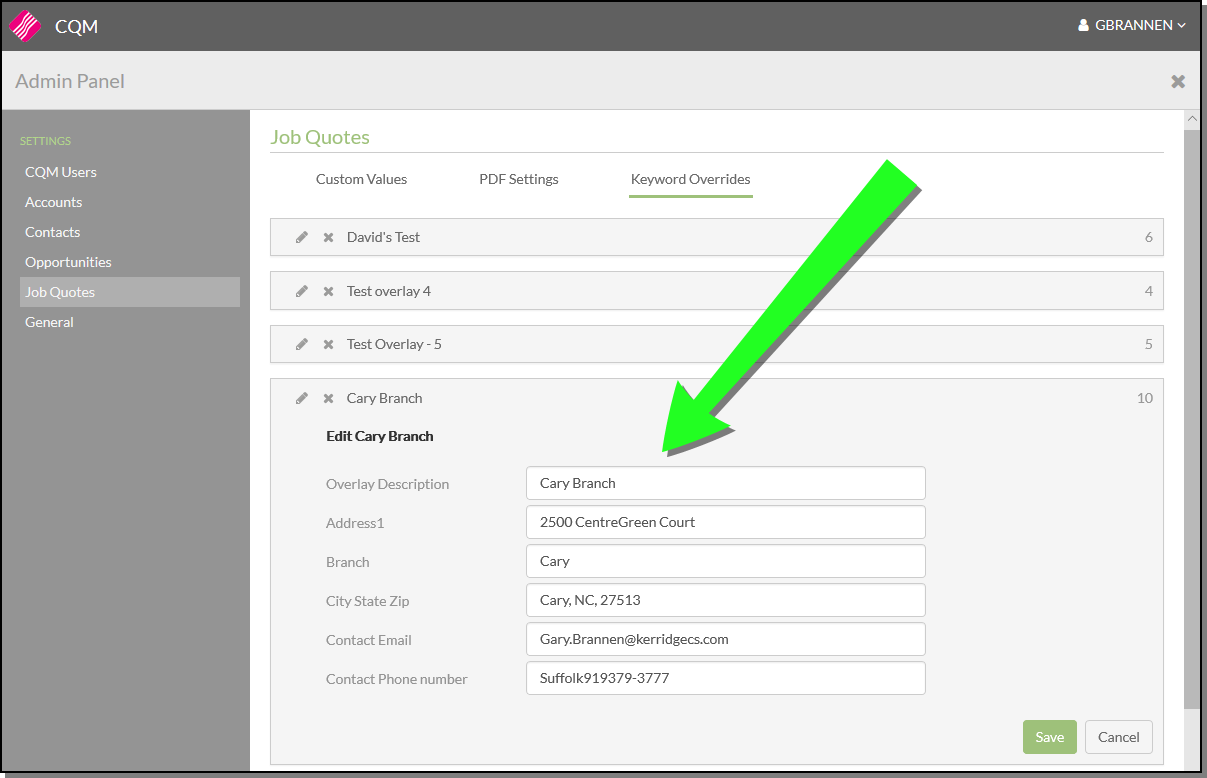
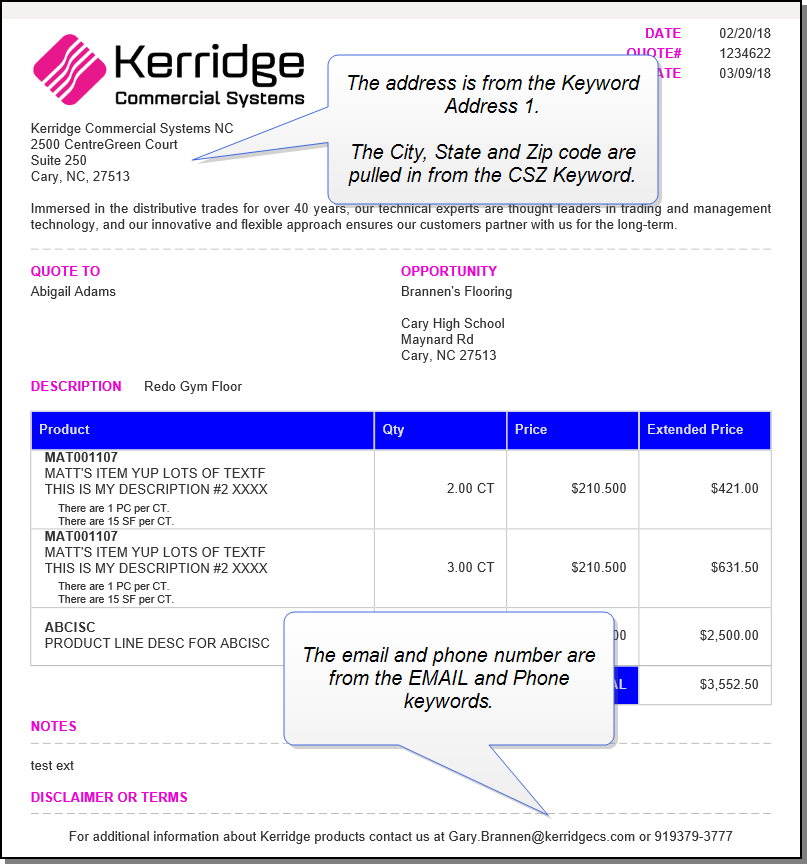
If the Keyword Override Cary Branch is used when the PDF of the Job Quote is created...

...the values entered for the keywords are used.
 EMA
EMA
Assigning Overlays to CQM Users
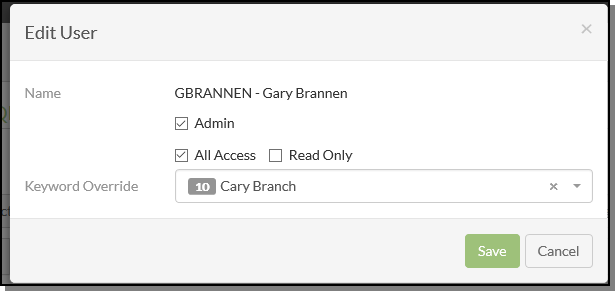
The Overlays can be assigned to Users via the CQM Users section of the Admin Panel.
Click on a user...
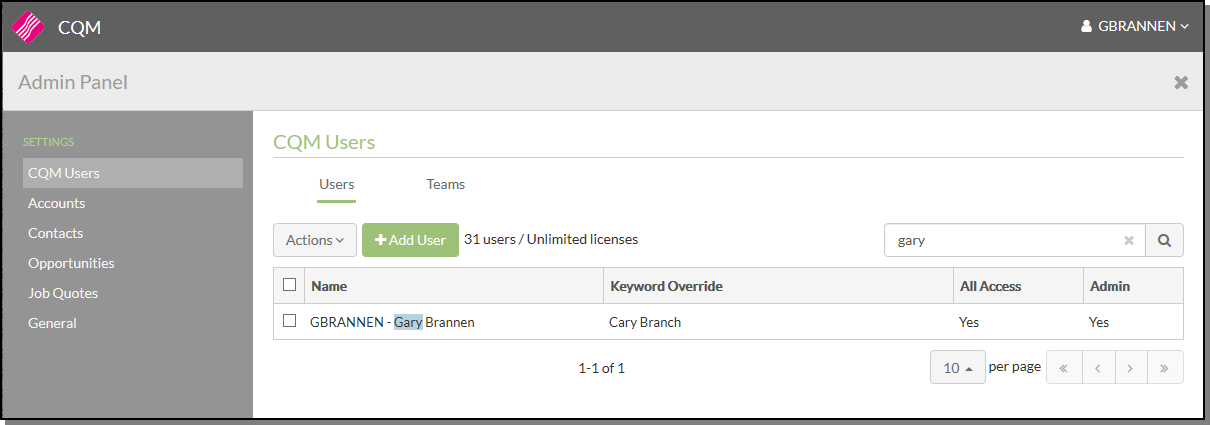
...to access the following pop-up where an overlay can be assigned via the Keyword Override setting.
Printing and Distributing Job Quotes
A Keyword Override setting has been added to the Distribute or Print Job Quote window.
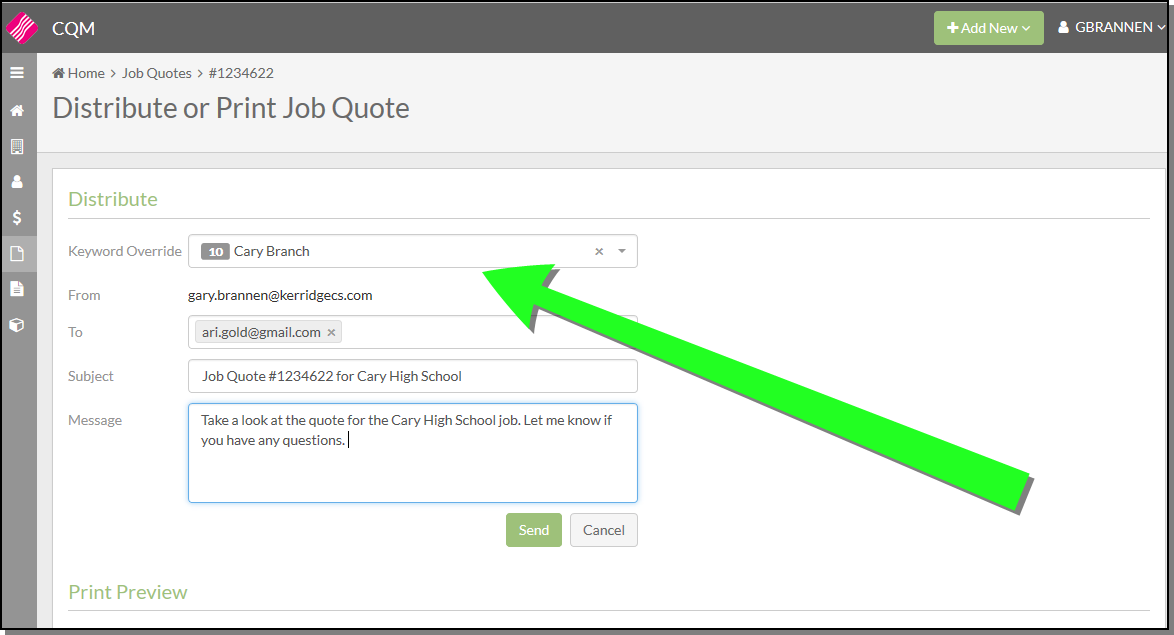
The Keyword Override controls the data used for the PDF displayed on the screen and the PDF attached to the email. For example: If Cary is selected then the Keywords are replaced with the values defined in the Keyword Overrides for Cary.
General Tab
This tab controls the application defaults.
The Pagination default sets the number of records that show on the screen.
The Edit Product setting gives you flexibility over which cost and pricing to use.
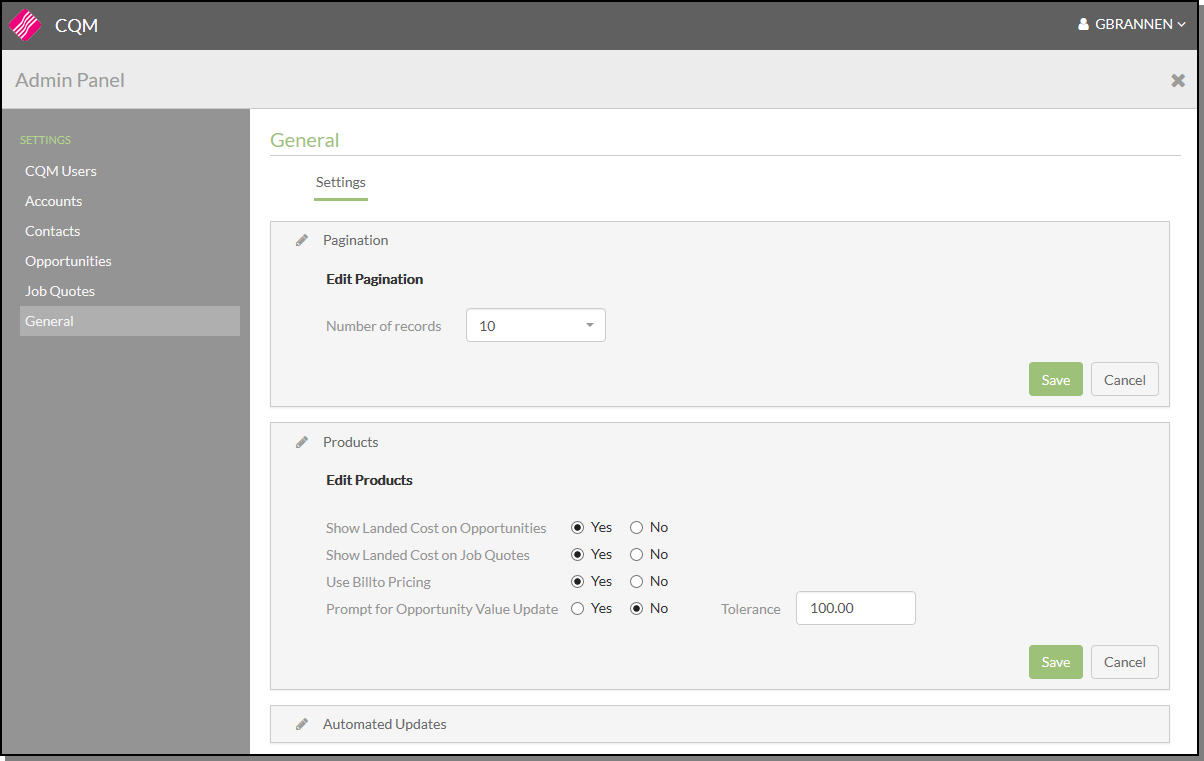
When the Use Billto Pricing option is enabled the user can select a BillTo account to determine pricing of items in the Products section of Opportunities and Job Quotes.
If a quote is saved the Prompt for Opportunity Value Update setting is checked.
- If it is activated, the default is N, the Tolerance is checked.
-
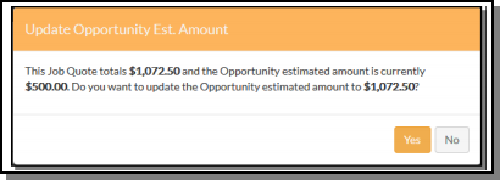
If the Tolerance is populated and the difference between the estimated opportunity value and the job quote extended price is greater than the tolerance amount, the user is prompted with an option to update the opportunity.
Automated Updates
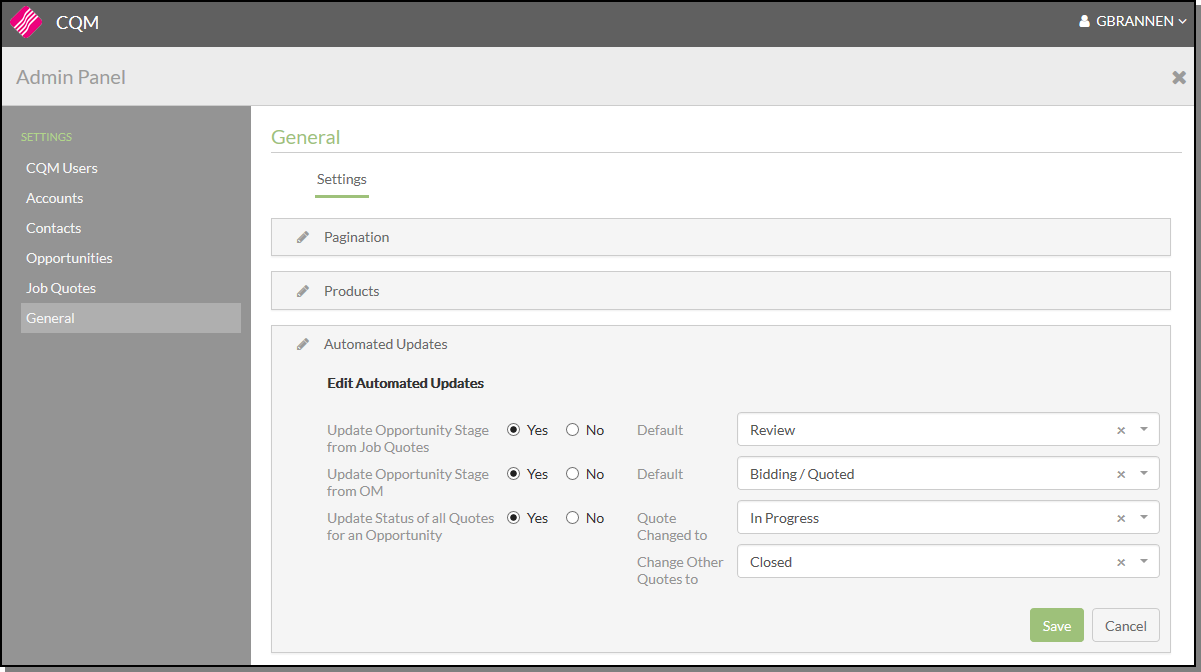
Update Opportunity Stage from Job Quotes
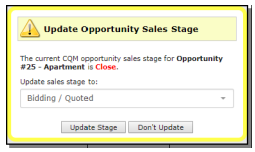
If the Update Opportunity Stage from Job Quotes setting is activated and the status of Job Quote is changed the following prompt appears.
Update Opportunity Stage from OM
If the setting Update Opportunity Stage from OM is activated, when ending order entry or order edit in Navigator OM, if an opportunity or CQM job quote is associated with the order, you are prompted to update the status of the opportunity.
Update Status of all Quotes for an Opportunity
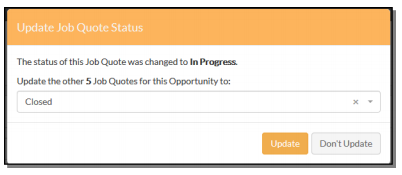
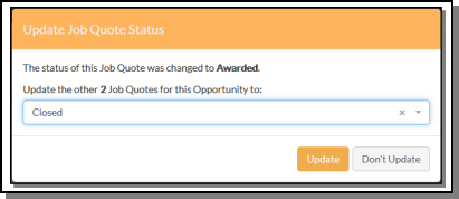
If the setting Update Status of all Quotes for an Opportunity is activated and a Job Quote is changed to the status entered in the Quote Changed to field all other quotes assigned to the same opportunity are automatically assigned to the status entered in the Change Other Quotes to setting. For example, if a job quote is changed to the status of In Progress all the other job quotes assigned to the opportunity are labeled as Closed.
The following prompt appears.
